Header image credit: Advocate Printing
As a design student, one of the most important physical documents to me is my printed portfolio. This document helps display my project work, my typographic skills, my layout skills, and my production skills. One of those important skills is picking the most effective and appropriate binding for the book, and with so many to choose from, it’s important that I know what they are.
Important Considerations
While visual aesthetic is important to a designer, bindings are not all about how it looks. Instead, the main focus is on three important qualities:
- Function of the document
- Number of pages
- Printing budget
Other aspects to consider are the time frame and necessity for reproduction, however these serve more as constraints on your binding options rather than determining qualities. You don’t want to choose a binding method that causes something to miss a deadline or a hand process for a mass-produced product like a magazine.
The Binding Methods
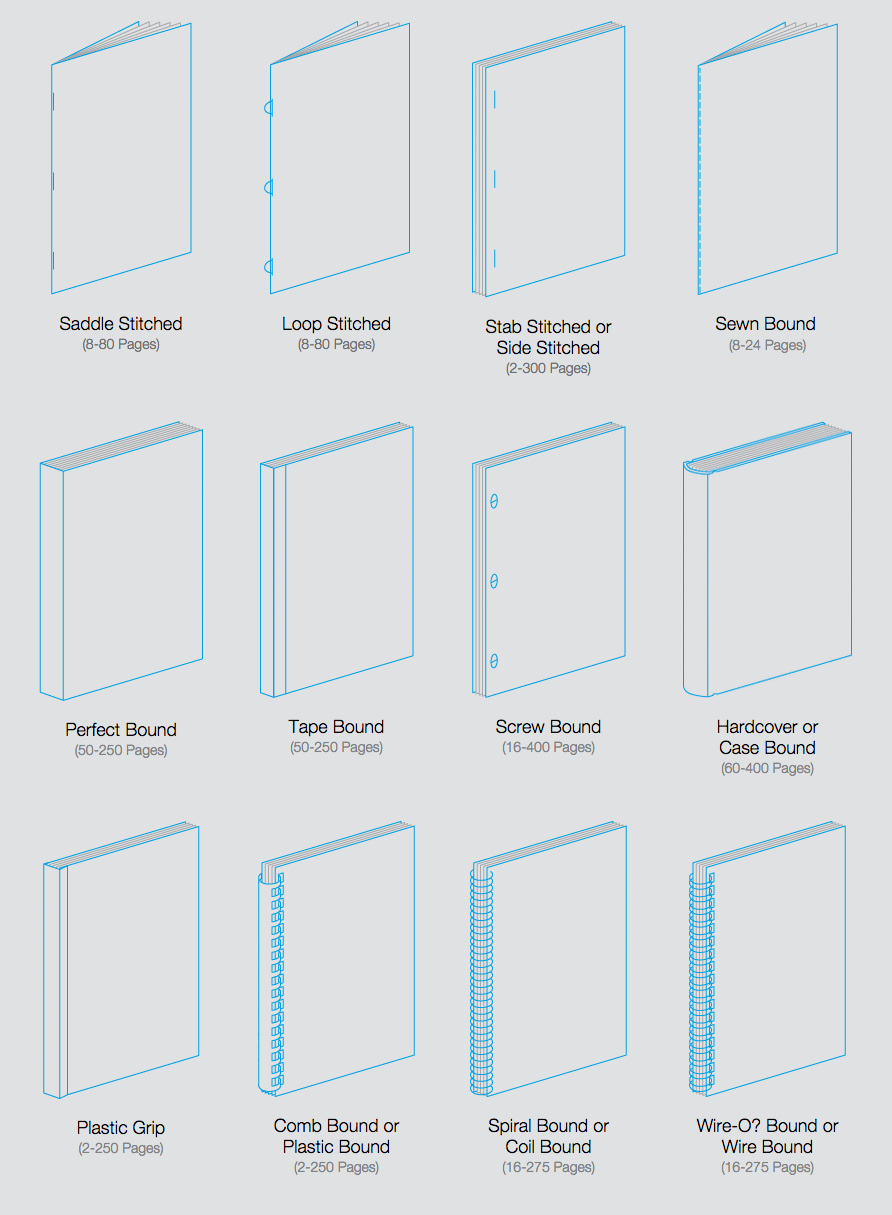
Saddle Stitch
Picking up any magazine, you’ve already encountered one of the most common forms of binding. Due to it’s ability to be highly cost effective and quick, this binding method is widely used in mass-produced documents.
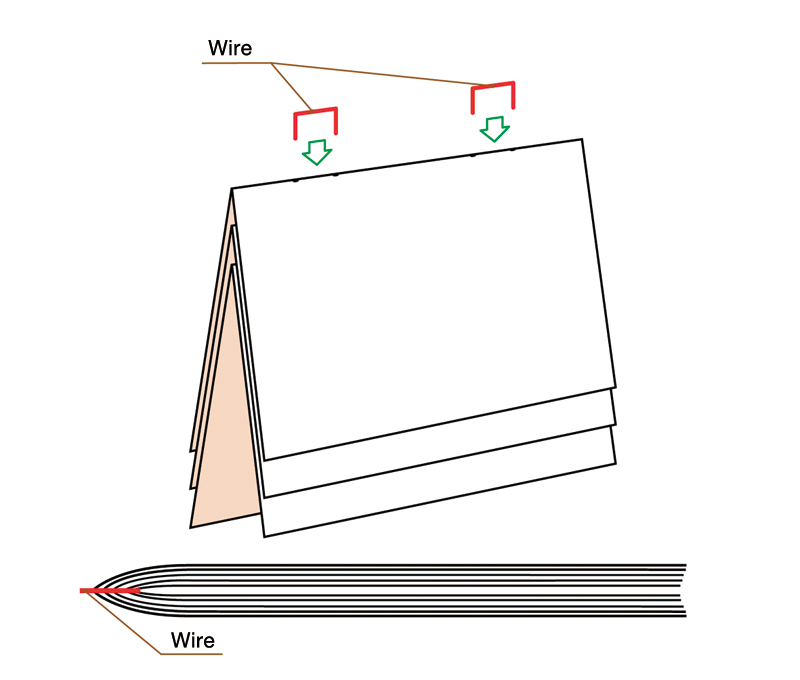
Image credit: Art Design Glossary
The process involves punching a wire into the spine (the center backing of a book or catalog) and bending the wire flat against the surface of the interior. This grips all of the pages and can be seen on the interior in the halfway point of the pages created by the binding.
Loop Stitch
This binding method is quite similar to saddle stitching, albeit with a different goal in mind. Loop stitching is better suited for segments or parts of a larger collection, as the resulting loops (hence the name) are intended to allow it to be inserted into a 3-ring binder.
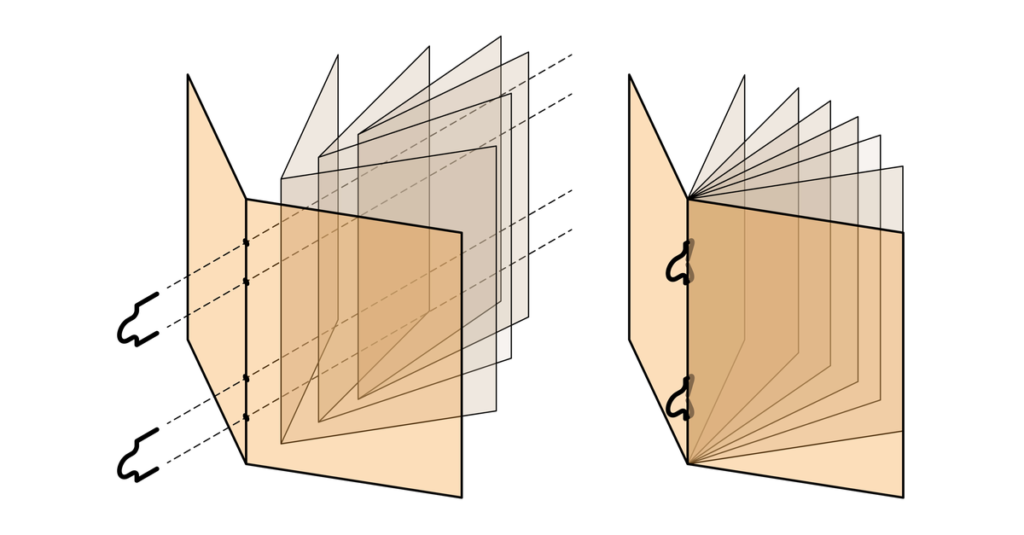
Image credit: Ironmark USA
Much like saddle stitching, this process involves punching wire through outside spine of the documents. Instead of being flush with the spine, loop stitching leaves a little extra wire on the outside that becomes a ‘U’ shape. This allows the rings of a 3-ring binder to slide right through while keeping the pages of the document together and without any unnecessary hole punching.
Stab/Side Stitch
While loop stitching was a quirky little change on the typical saddle stitching process, stab stitching, or side stitching, completely turns it on its head.

Image credit: Alpha Graphics
Much like the name implies, this process involves stabbing the wire through the side of the front cover, through all the pages, and out the back cover. This is often covered to hide the wire due to it being on the more frequently viewed sides of the documents than the spine is.
Sewn Bound
What can be considered another variation on saddle stitching, sewn binding can be considered the rich cousin that looks down on their less fortunate relatives. Because of the techniques and materials used for sewn bindings, this is a highly expensive and more time consuming process.
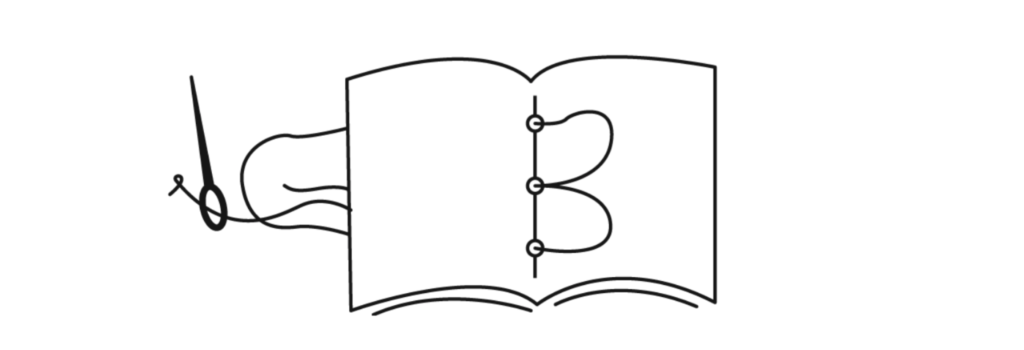
Image credit: LOC Pamphlet Stitch
Instead of using a wire, sewn binding uses a thread that punctures the spine to connect the pages to each other. This thread is sewn along the entire spine, unlike the more reserved usage of wire in the saddle stitching process and its variations. This can make the pages more secure to one another with multiple threads connecting them instead of a couple pieces of wire.
Perfect Bound
When it comes to high-quality bindings, this is the one most designers try for. Not only does it create a nice, clean, and straight spine, but the interior pages don’t have evidence of the binding creating a seamless experience.
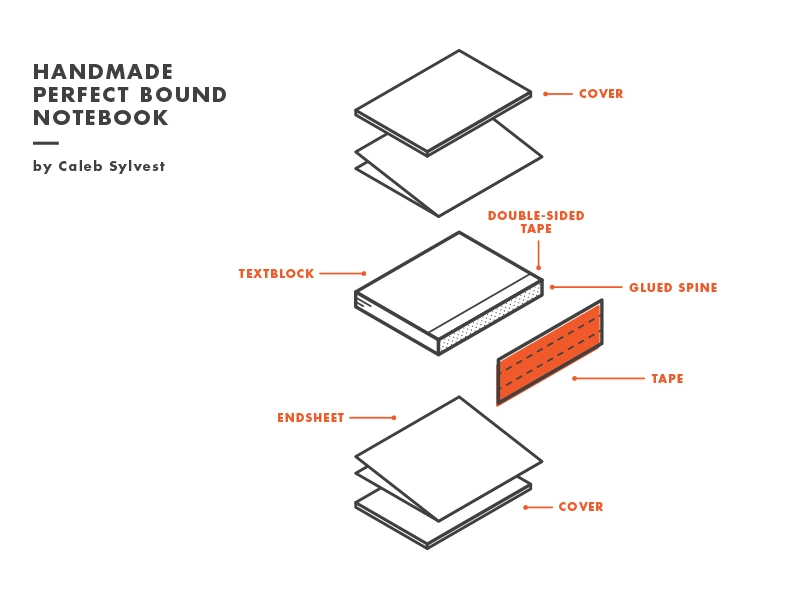
Image credit: Caleb Sylvest
The process starts by grouping folded pages into sections called signatures. These signatures are then prepped for gluing by having their spines chopped off and their back edges roughed up to better adhere to the cover. With all of the sections prepped, they are all glued to the wrap-around cover.
Tape Bound
Although not the most effective binding method, usually requiring a supporting method, tape binding is a good choice for a more hand-crafted and rough look. In a sense, it almost serves as a “poor man’s perfect binding.”
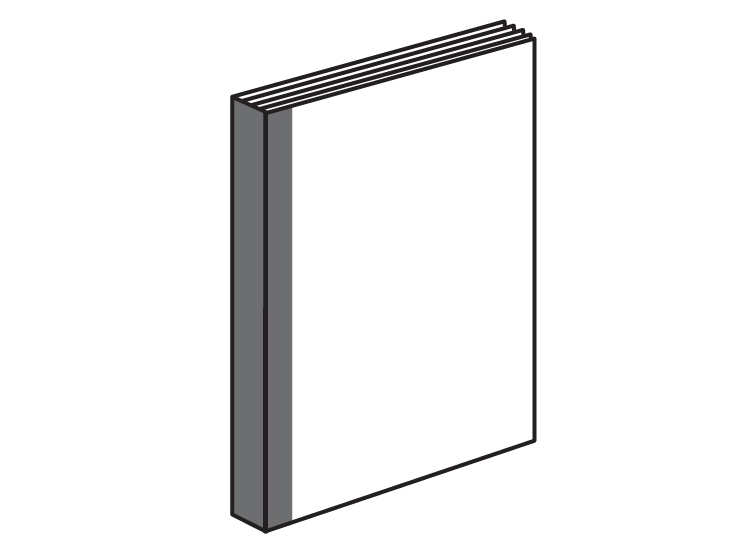
Image credit: Alpha Graphics
Typically supplemented by stitching the pages together, the process involves a large piece of adhesive tape that is laid along the spine and around onto the front and back covers.
Screw Bound
Another one of those pricey binding methods, screw binding is not something I had heard of before. The only example I could find mentioned were swatch books. As it’s not the most common binding technique due to it’s tendency to intrude on the physical experience, it’s not something you would see everywhere and could be a great way to stand out if used appropriately.
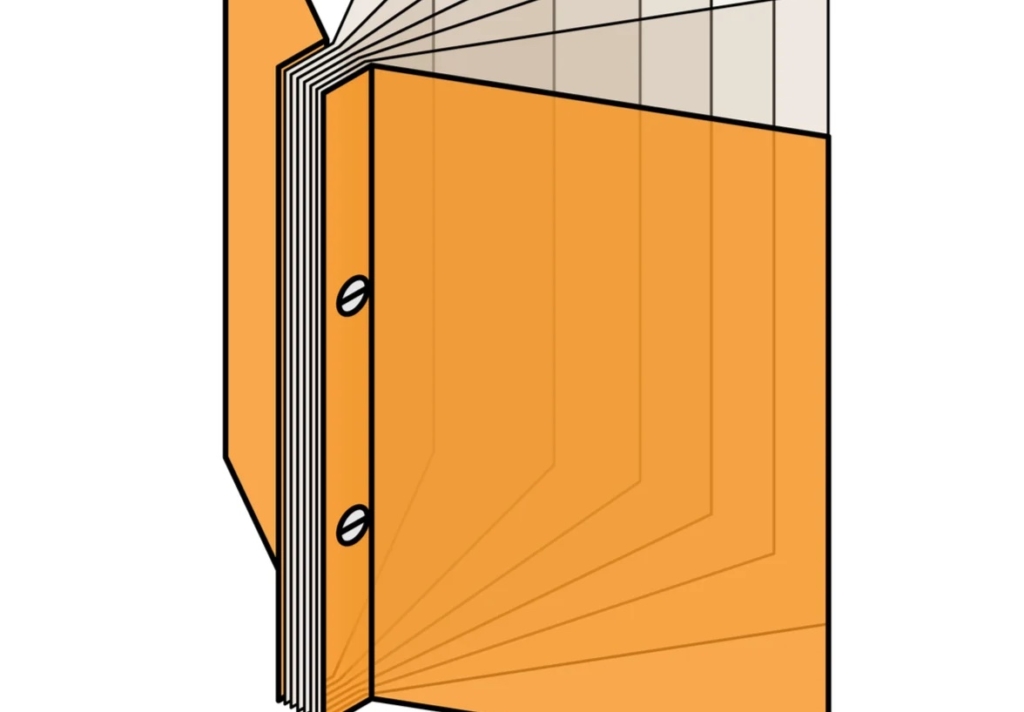
Image credit: Ironmark USA
Screw binding is a lot more involved than some of the other binding methods. First, it requires for holes to be bored out of the pages of the document. Then, something called a barrel post gets inserted into the hole on one end and a cap screw is added on the other side to hold everything together.
Case Bound
When you think of a nice hardcover book, this is the binding method they’re probably using. Often called hardcover binding, case binding is used in conjunction with a hard cover and is fairly similar to perfect binding.
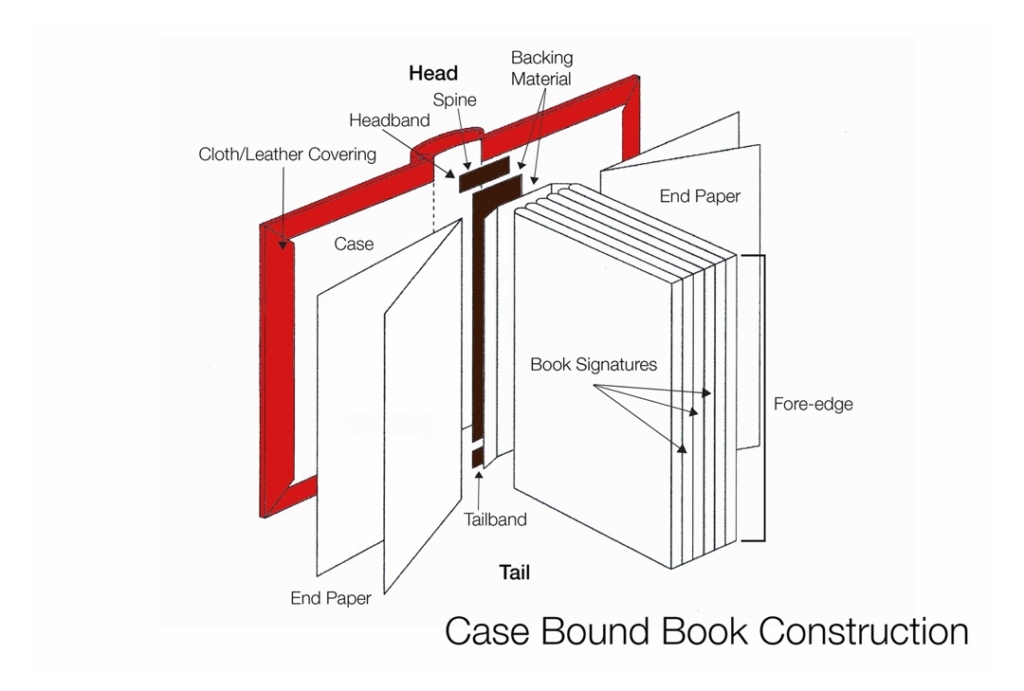
Image credit: bluesyemre
Much like perfect binding, the pages are grouped into sewn sections. Afterwards, they are glued to the inside of the hardcover’s spine and creating a very sturdy document.
Plastic Grip
This is one of the easier binding methods of the group, and is also highly cost effective. Because of how easy they are to apply, as well as a lack of adhesive or material binding, this method could work well as a temporary binding to evaluate the validity of a prototype.
Image credit: Alpha Graphics
Using a 3-sided plastic mold, the binding is slid onto the document by prying apart two plastic strips. These strips then clamp down on the spine of the document, securing it in place.
Comb Bound
One of the most easily recognizable bindings upon first glance, comb bindings are an incredibly cost effective and simple binding solution for many documents. Typically being found on manuals and guides, these bindings are well-known for allowing their pages to lie flat on a surface.
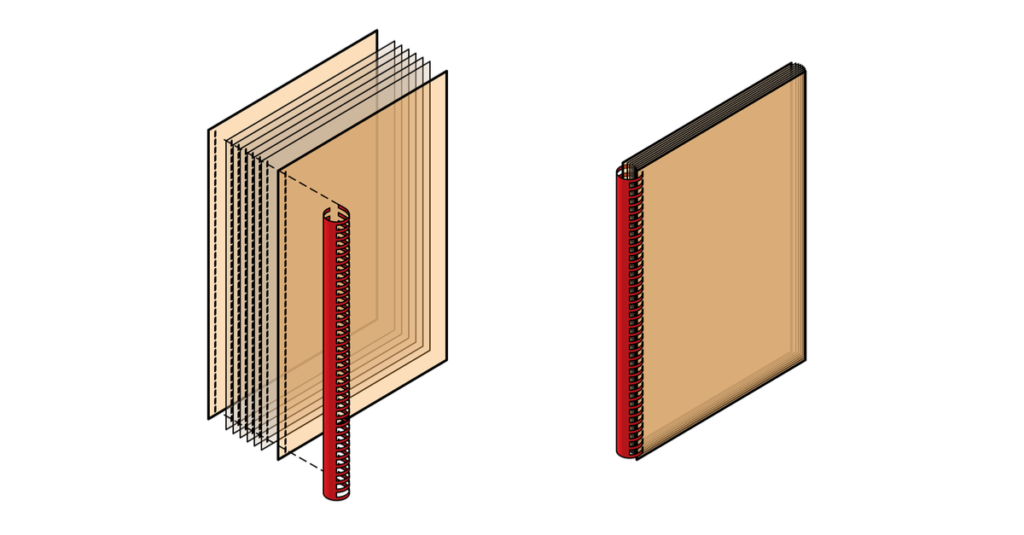
Image credit: Ironmark USA
Using rectangular holes punched into the pages of the document, a plastic cylinder with rings cut into the mold are fed through each of the corresponding holes. The comb typically features a solid back that protects the document’s spine.
Spiral/Coil Bound
Taking the comb binding one step further, a spiral or coil binding also allows the pages to lay flat on a surface as well as flip all the way around to the other side of the document, allowing for an easy bookmark of your current location within the document and a more handheld-ready method for looking at the document.
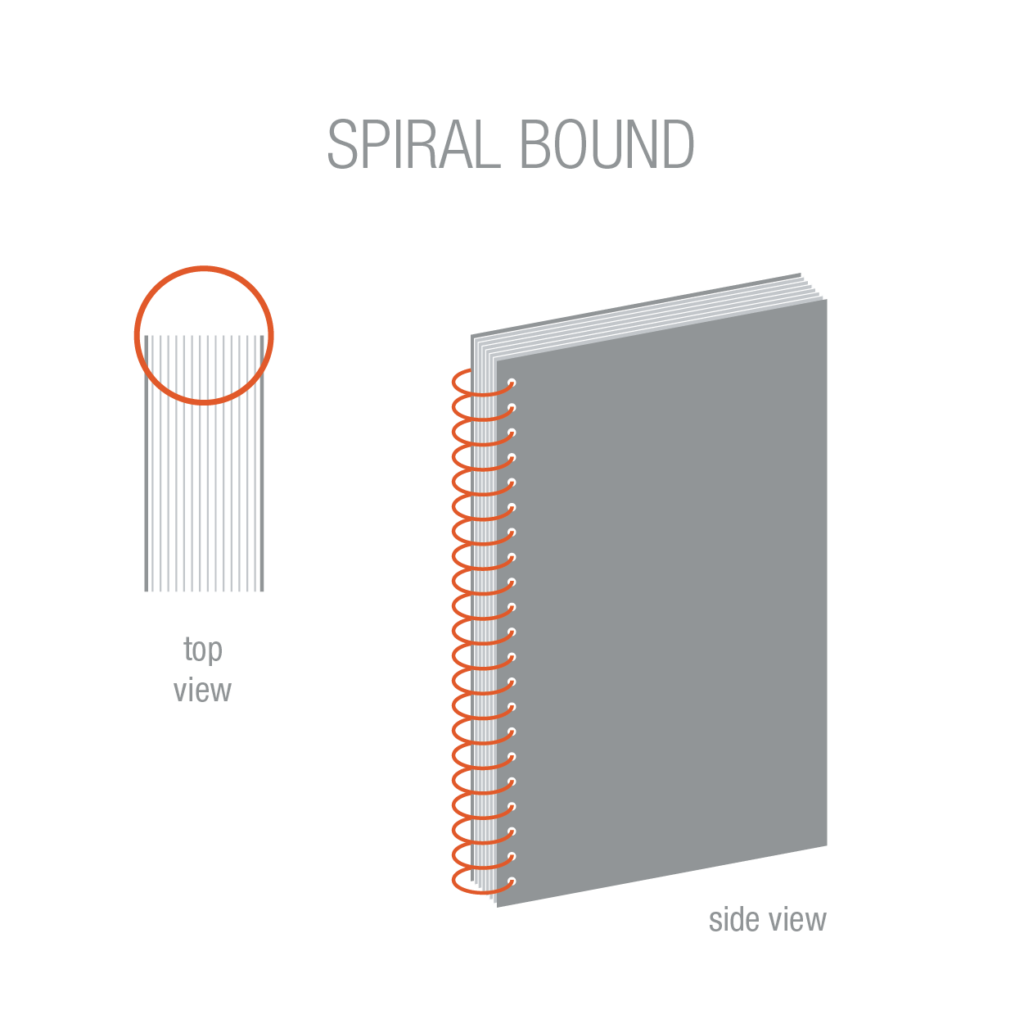
Image credit: General Services Division, Montana
Much like its counterpart, this method also uses holes punched into the pages of the document. The wire is fed through the holes and coils around each consecutive hole, being clipped and bent off at the ends to prevent it from unraveling. This very visible display of the wire led it to commonly be offered in a variety of colors.
Wire Bound
Picking up where spiral binding left off, wire binding takes it a step further and creates a more visually-appealing binding that allows for the flat-on-the-table and wrap-around function of the document.
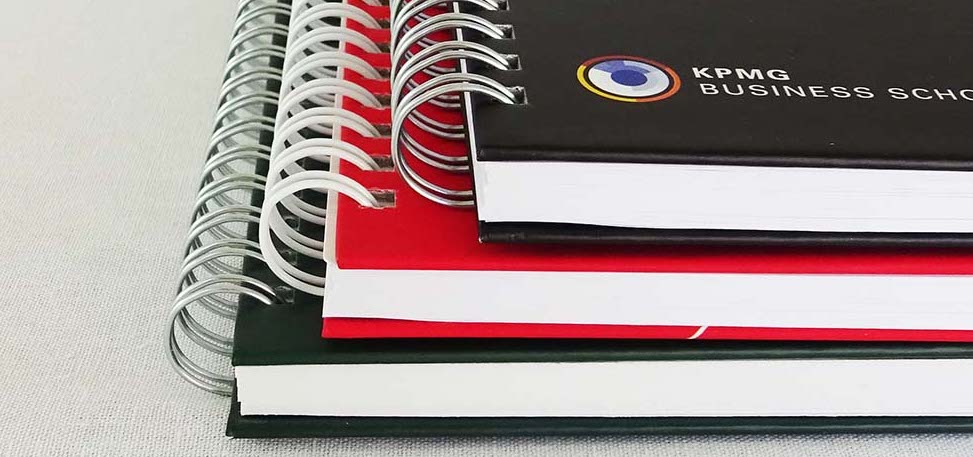
Image credit: Pulsio Print
Following the trend and using punched holes in the document, this method uses a formed wire that is fed through each corresponding hole. While being offered in a variety of colors, it is also a more durable binding option.
With everything I’ve discussed about production, I’ve become more and more confident in my abilities to control the physical artifact that I can create with my design. From paper, to envelopes, to bindings, I can see the end result of my next project being that much closer to my ideal image for it’s production.
References
“Choosing the Right Binding Type.” Design Insights, PDF.
“Book Binders.” Deanprint, https://www.deanprint.co.uk/servicetype/book-binding/